I have been running around the American Cheese Society 2010 conference with my fancy camera having a blast. I just found time before breakfast on the last day to post some pictures. More to come…
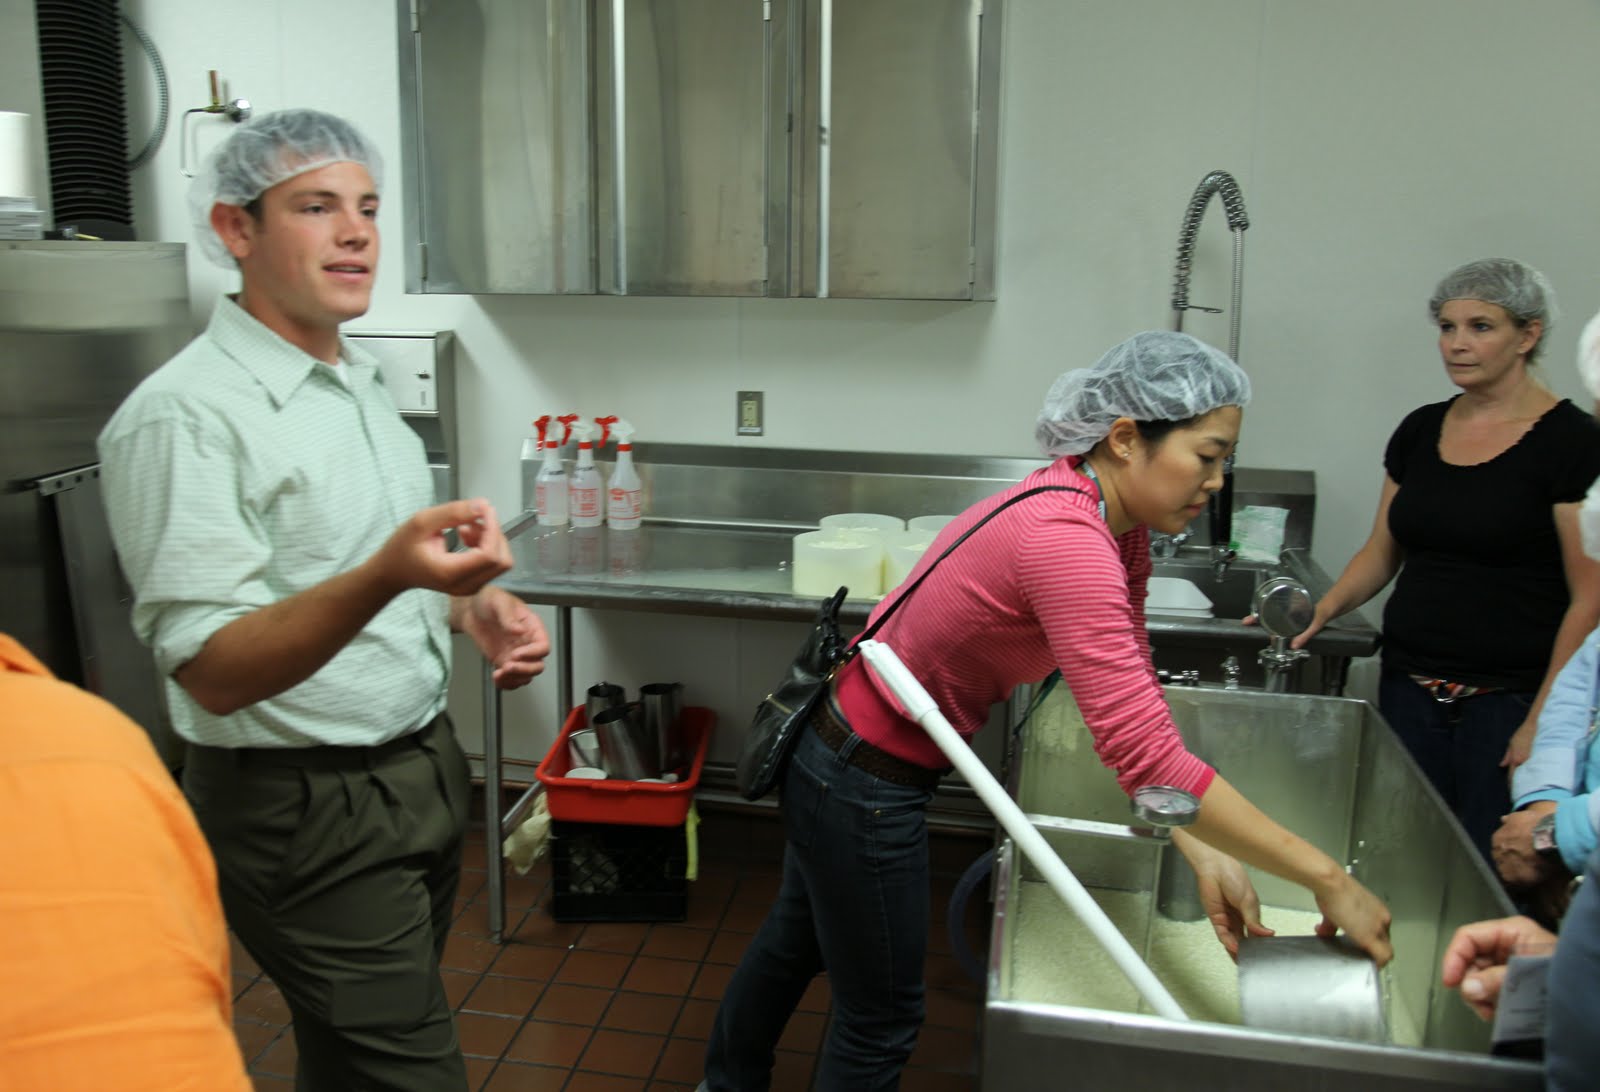
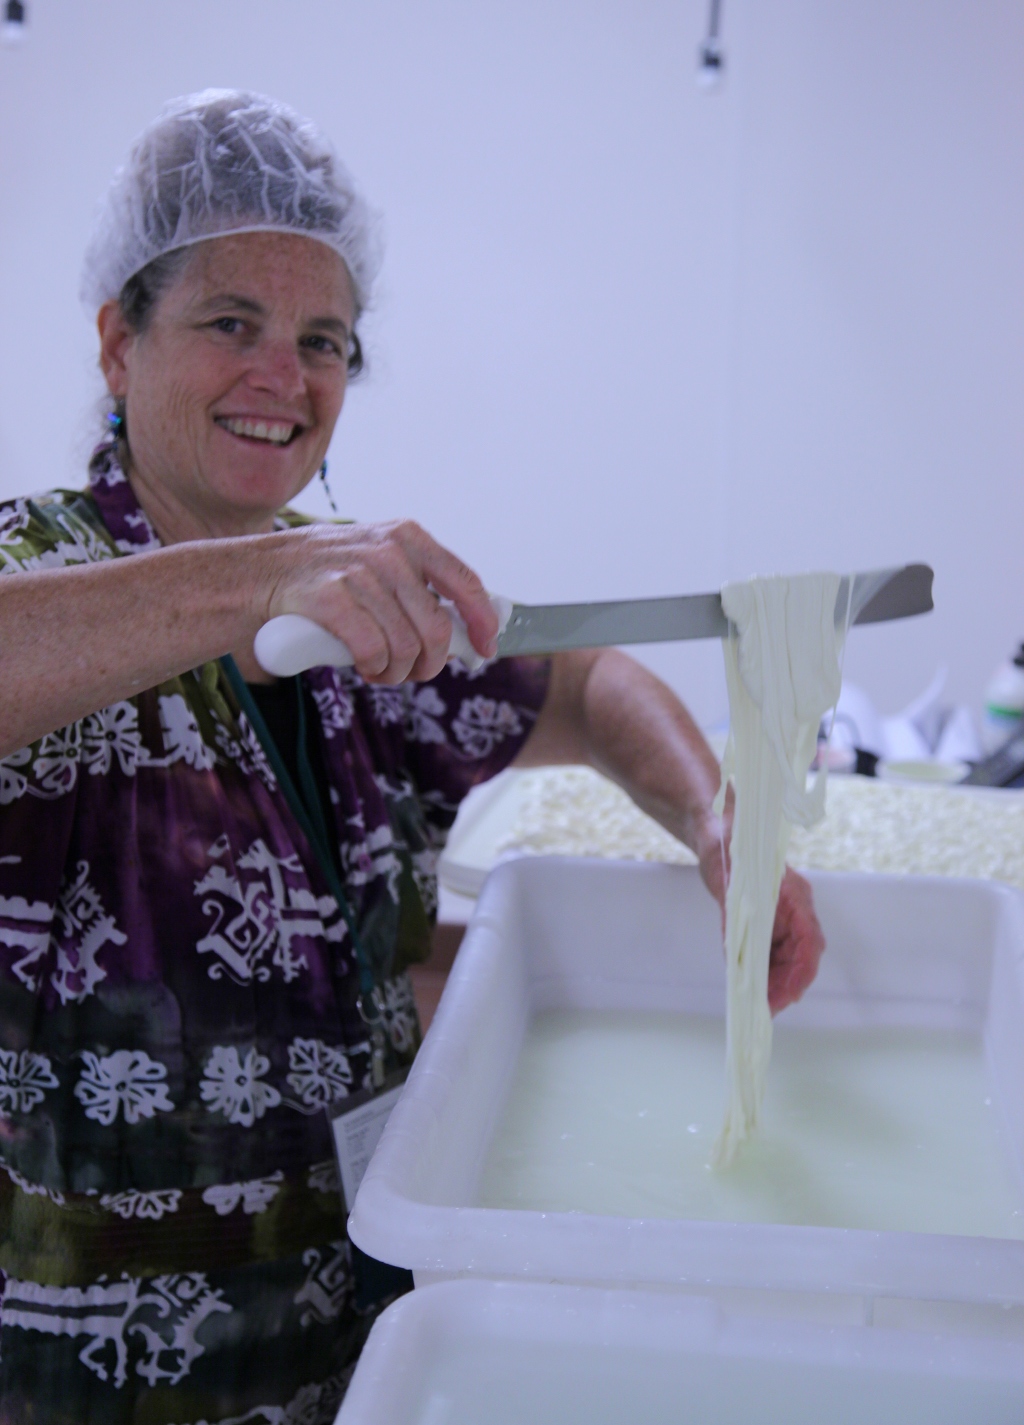
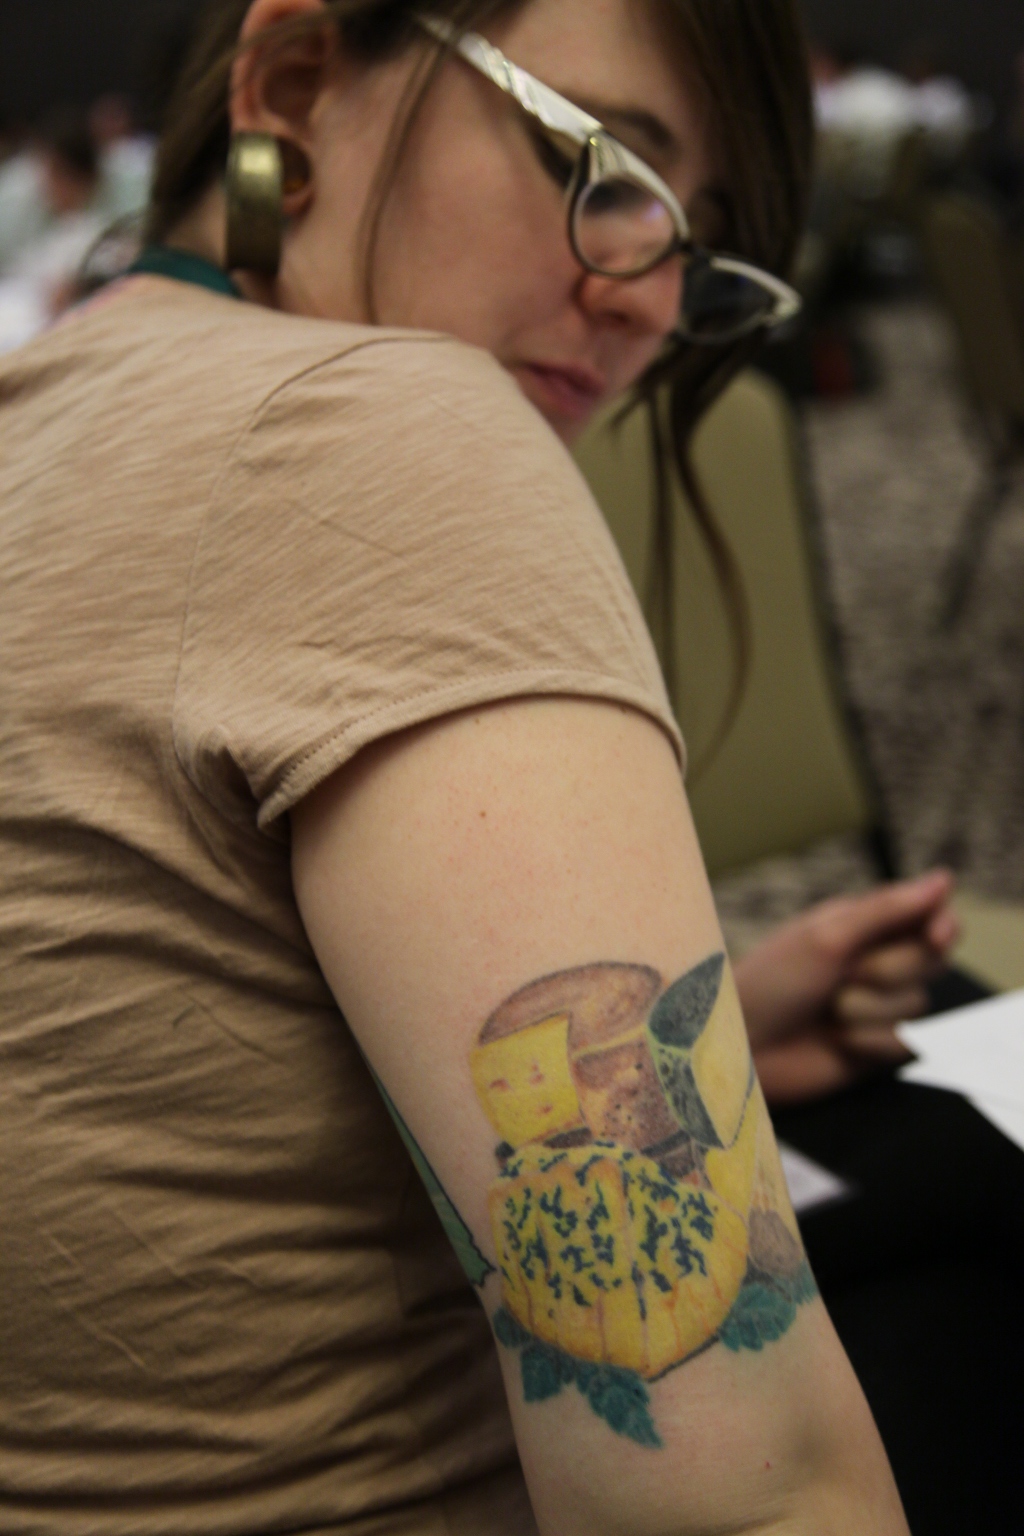
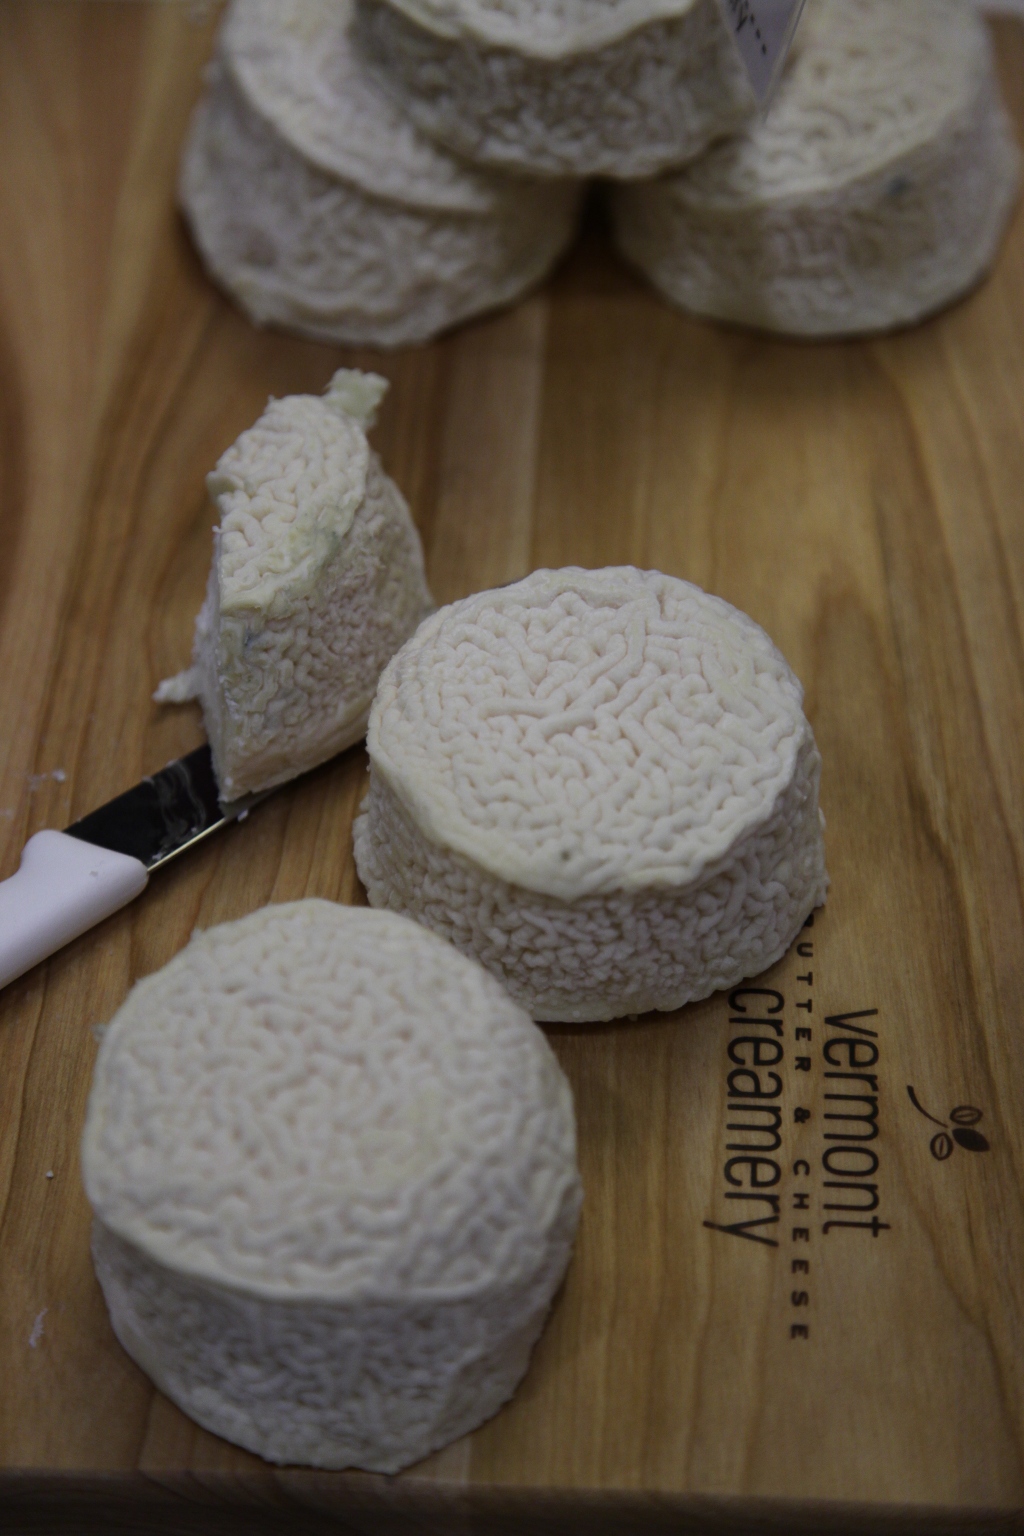
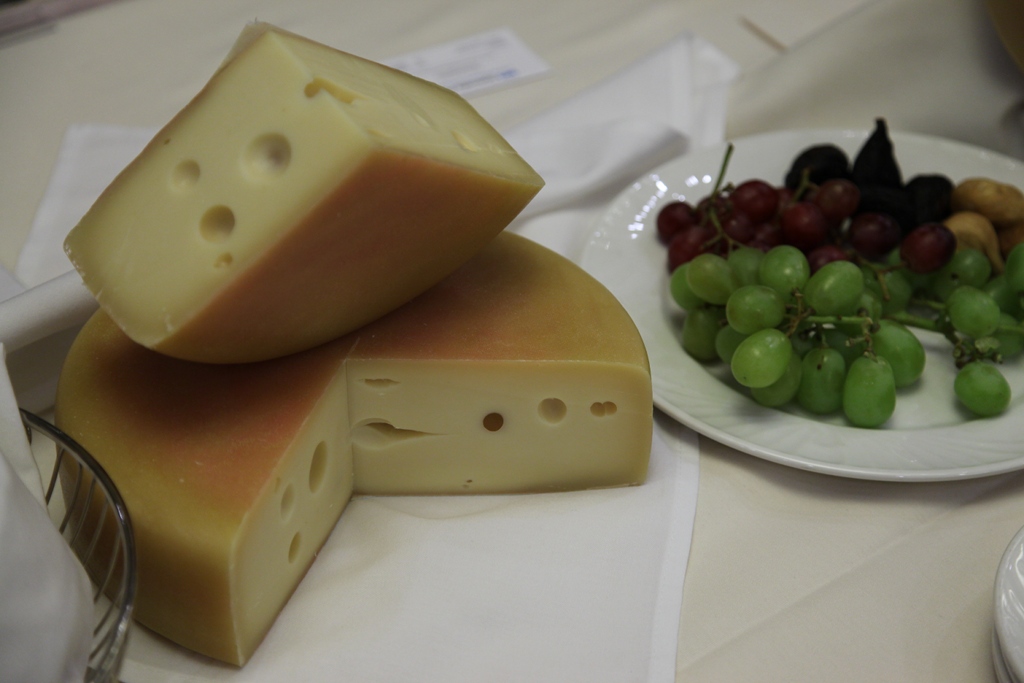
I have been running around the American Cheese Society 2010 conference with my fancy camera having a blast. I just found time before breakfast on the last day to post some pictures. More to come…
Yogurt falls into the category of “dairy product,” a category that also includes cheese, butter, crème fraiche, and kefir, among other things. While it is not cheese, it fits nicely into the discussion of home cheesemaking because making yogurt is identical to culturing cheese, and you get to skip all of those complicated (but fun!) chores like cutting curds, pressing, and aging.
Yogurt is simply milk which has been fermented by a cocktail of lactic bacteria. Yogurt cultures prefer temperatures near 115°F, much warmer than mesophilic cultures which prefer the 85-90°F range. There is some overlap in bacterial species between thermophilic cheese cultures and yogurt culture, and in a pinch you can use yogurt in place of thermophilic culture to make cheese, though the results will not be identical. Technical facts aside, what this simply means is that if you heat milk to 115°F, add some commercial yogurt with active cultures, and maintain the temperature for 12-16 hours you can turn 8 oz of yogurt into 2 quarts overnight.
In Alton Brown’s Good Eats episode “Good Milk Gone Bad,” Alton describes his mad scientist method of making yogurt which involves a clear container, a heating pad, and a trash can (he demonstrates this and other gadgets on a spot on David Letterman).
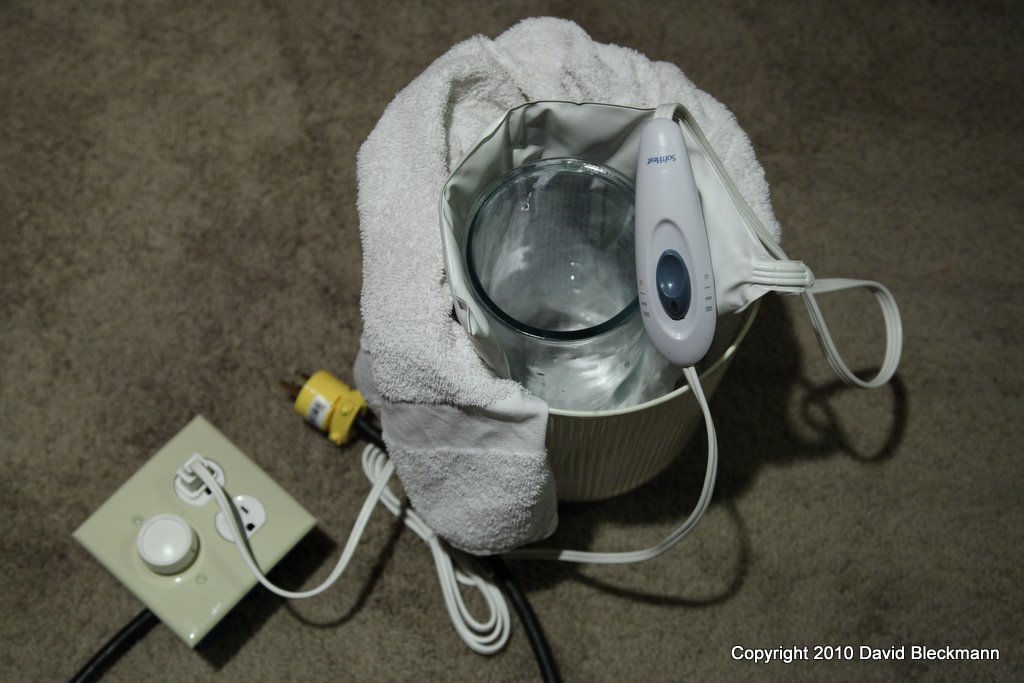
Being the devoted AB fan that I am, I constructed my own incubator using a flower vase, a heating pad, a towel, a digital thermometer and a light dimmer. It makes fantastic yogurt, but I have to admit it is not something I would recommend to someone who doesn’t like tinkering with things like I do.
It occurred to me recently that rather than leading a prospective yogurt maker down the mad scientist path described above, you could keep milk warm overnight using the same method I have been using to culture cheese starter: Keeping a jar of inoculated milk in a picnic cooler filled with warm water. Basically you just warm the milk up to about 5°F higher than your target temperature and place in a picnic cooler with water of the same temperature. Over the course of incubation the temperature will drop slowly (the cooler does a pretty good job at maintaining heat), and for the majority of the time it will be in the right range.
So here is my recommended method for making yogurt at home, using easy to find items and no mad scientist contraptions. This method uses the microwave to heat the milk, which is my favorite method since it is easy to control and does not dirty a saucepan, but you can also heat the milk carefully on the stove if you like. If you can use more yogurt, mix up two jars instead of just one.
All equipment should be clean before starting.
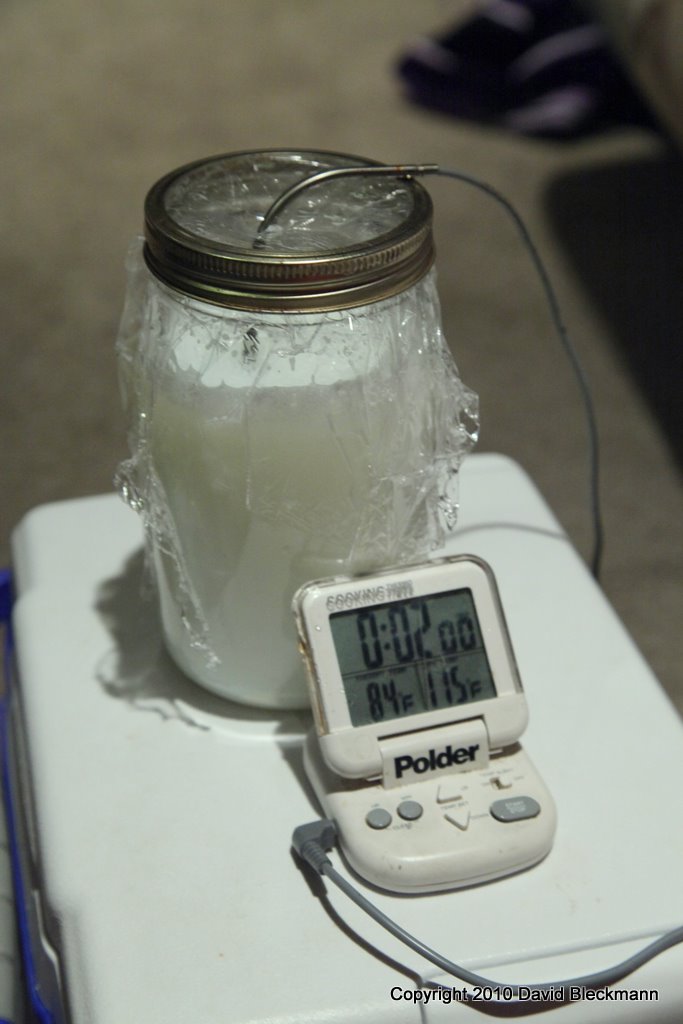
Sterilize the jar and lid by filling the jar to the rim boiling water and putting on the lid. Being careful not to burn yourself, open the jar and sterilize the spoon placing it in jar for 2 minutes. Sterilize the mixing bowl and thermometer by filling the bowl with boiling water, running the water over the probe of the thermometer while filling the bowl. After 2 minutes, pour out the jar and the bowl. Set the spoon and thermometer in the bowl when you are not using them so they do not get contaminated.
Add milk to the jar until it is about 3/4 of the way full. Place jar in microwave and heat on high power for 1 minute, then remove, stir with spoon and check the temperature with thermometer. Return to microwave and heat again for 20 seconds, then stir and check temperature again. Repeat until the milk is 120°F. Place lid on jar.
Add dry milk and stir. Add the yogurt or starter and stir. Add the honey and vanilla, if using, for a sweeter yogurt.
Fill picnic cooler with hot water from the faucet. As you are filling, insert the thermometer in the cooler and adjust faucet until the water in the cooler is 120°F. Fill the cooler until the water level is equal to the height of the milk in the jar when the jar is inserted. Do not let the water come over the top of the jar or let the jar fall over.
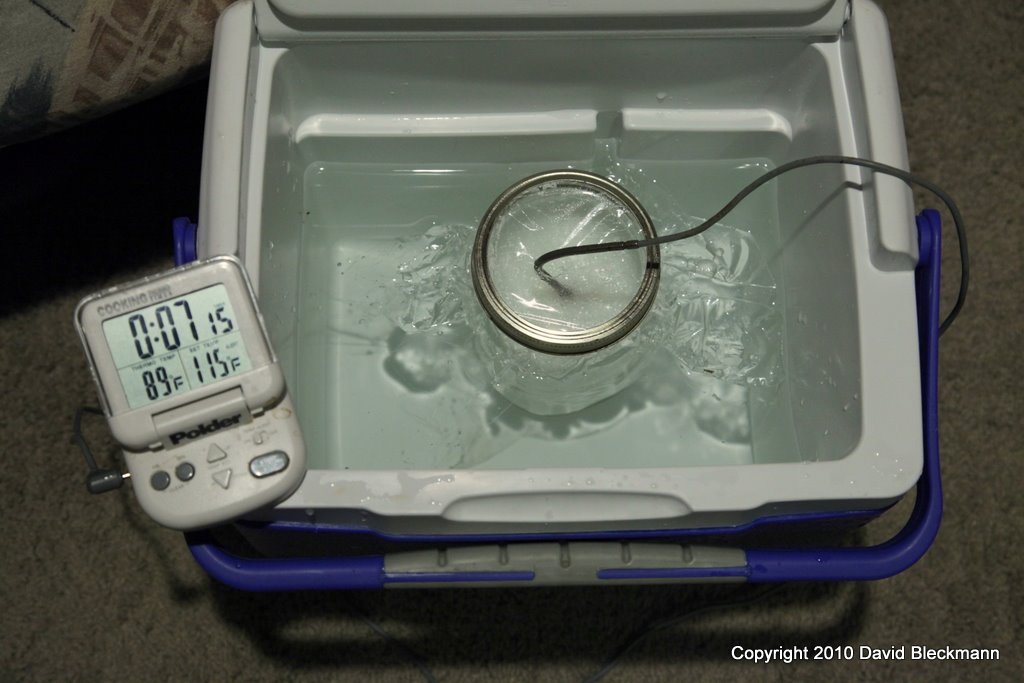
Place cooler in a location where it will not be disturbed and insert the jar. Close the lid and let the yogurt incubate for 12 to 16 hours, until it is thick. Transfer the yogurt to the refrigerator and use within 2 to 3 weeks.
I we be making the trip down to Central Point, Oregon this weekend to attend the Sixth Annual Oregon Cheese Festival. I’m looking forward to meeting all of the cheesemakers and trying avoid the cheese overload I experienced at the Wedge last October by carefully rationing the amount I sample.
If you see a guy walking around with a fancy camera and microphone trying to make it to every booth, come up and say hi!
Recently my wife and I took our two year old daughter to our local wine shop for a Friday night tasting. No, we did not give our daughter wine, but we did bring some of my homemade blue cheese, which she loves, to keep her content while we tasted a Portuguese wine flight. Our server was intrigued and asked for a sample of my cheese, which I was more than happy to show off. After at least saying she liked the cheese, she asked me, “So without going into all of the details, tell me how do you make cheese?”
I tried, but I did not really do a good job. I gave too many details of the process that I know too well, and I am sure it was too much information for someone who merely knows that cheese comes from milk and just wants to know a little bit more. I disappointed myself because answering a question like this in a simple manner is something I should be able to do. So I resolved to do better next time and decided to write a “how you make cheese” elevator pitch that I can spew in 2 minutes or less. Here it goes:
How was that?
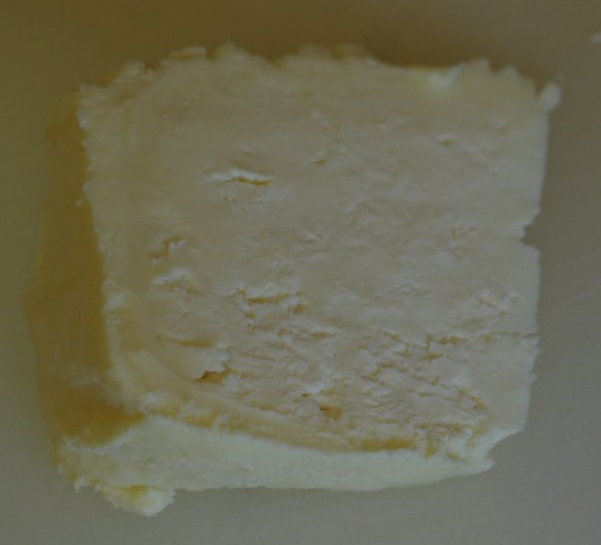
In the February edition of Sunset Magazine I was delighted to see an article on making your own cheese at home. They obtained recipes from two established artisan cheesemakers and presented Cowgirl Creamery’s Fromage Blanc and Bellwether Farms’ Ricotta.
I was extremely excited to see a mainstream magazine touch on the home cheesemaking phenomenon. I was even more excited that they were hosting a contest for readers to create recipes using these cheeses, with a prize of tickets to California’s Artisan Cheese Festival. I have discovered that I love to create recipes from scratch, it really gets the mad scientist in me going.
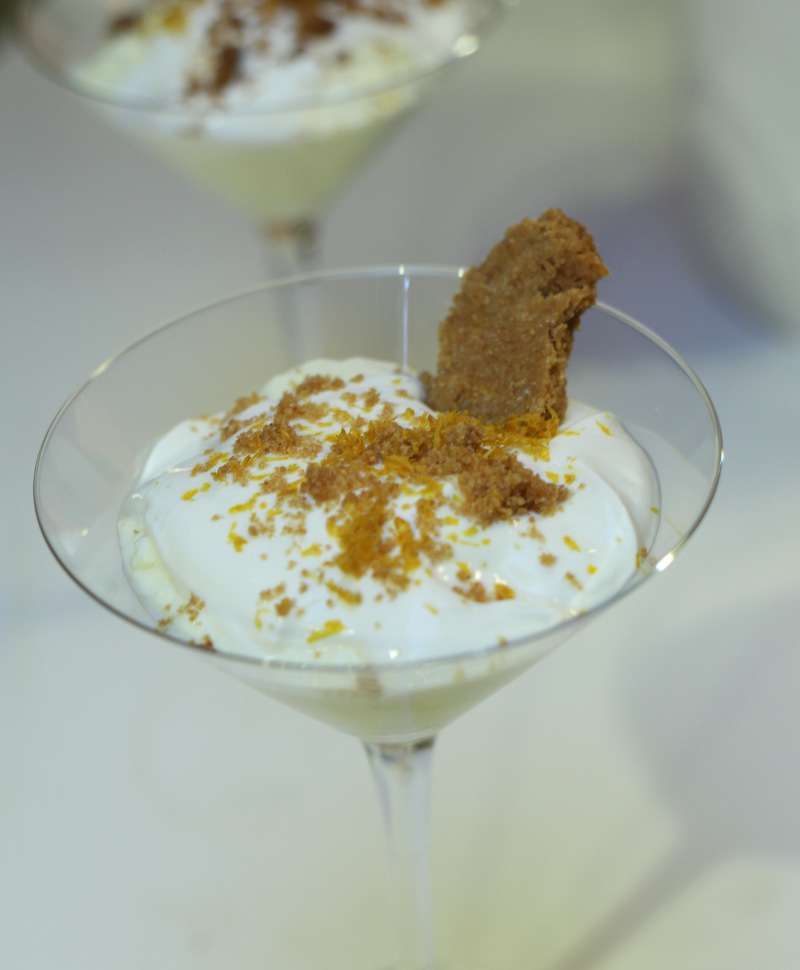 I entered a cheese desert, in the shape of a cocktail, turning the Cowgirl Creamery’s Fromage Blanc into a “Sweet Cowgirl Cheesecake Cocktail.”
You can download my Cheese Cocktail recipe here. If you make it let me know what you think. I thought it was a pretty good use of Fromage Blanc, which was one of the easiest cheeses I have attempted.
I also tried to make a savory dish with the ricotta by baking it whole. Sadly it unexpectedly burned in the oven. I will have to work a bit longer on getting that one right.
 I met Jon Clark at a recent cheese class where he was a student. Jon is currently teaching English in Hungary. Though he is really interested in making cheese, he does not have the luxury of being able to order ingredients over the internet and have them arrive in a timely or economical fashion.
We discussed that it is possible to harvest your own rennet, and I forwarded him a link to another obsessed cheesemaker, David B. Fankhauser. Dr. Fankhauser shows his attempt to create his own rennet from the stomach of a suckling kid (the goat kind). I thought if Jon were really desperate, this was something that he could try. If seeing where your food comes from does not disturb you, check it out here.
Jon replied and told me he had coincidentally just seen that very page in a recent posting to the blog Serious Eats. In this entry Jake Lahne discusses the use of the Cardoon Thistle as a cheesemaking coagulant.
I have read in American Farmstead Cheese that thistle was used in historic cheesemaking when animal rennet was not available or not desired. Jewish cheesemakers used thistle to create a kosher cheese (avoiding mixing meat and milk). Some cheeses are still made today using this process: Torta la Serena, Torta del Casar, and Serra da Estrela are examples.
I am very curious about trying to use Cardoon as a coagulant. My favorite seed company carries it, so I will try planting some this year. Stay tuned for results this summer/fall.
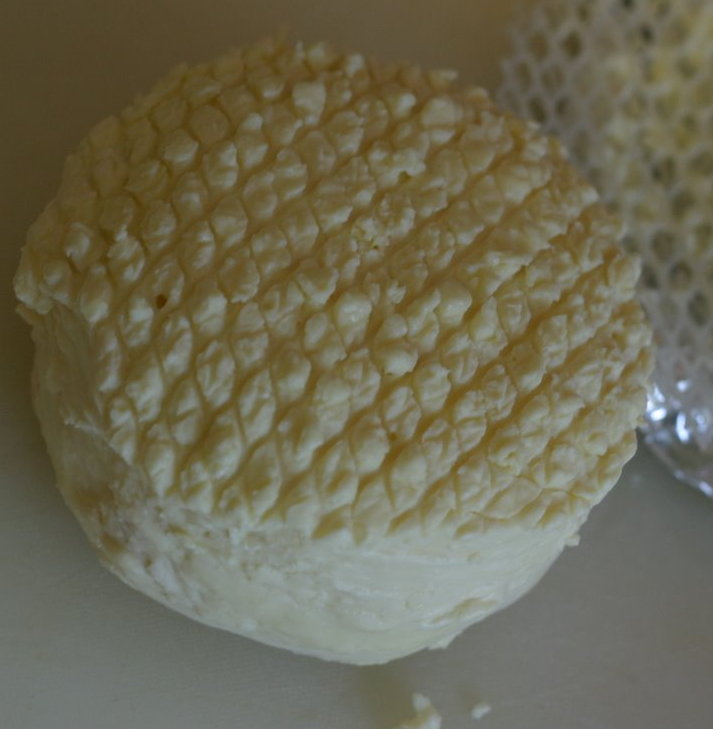
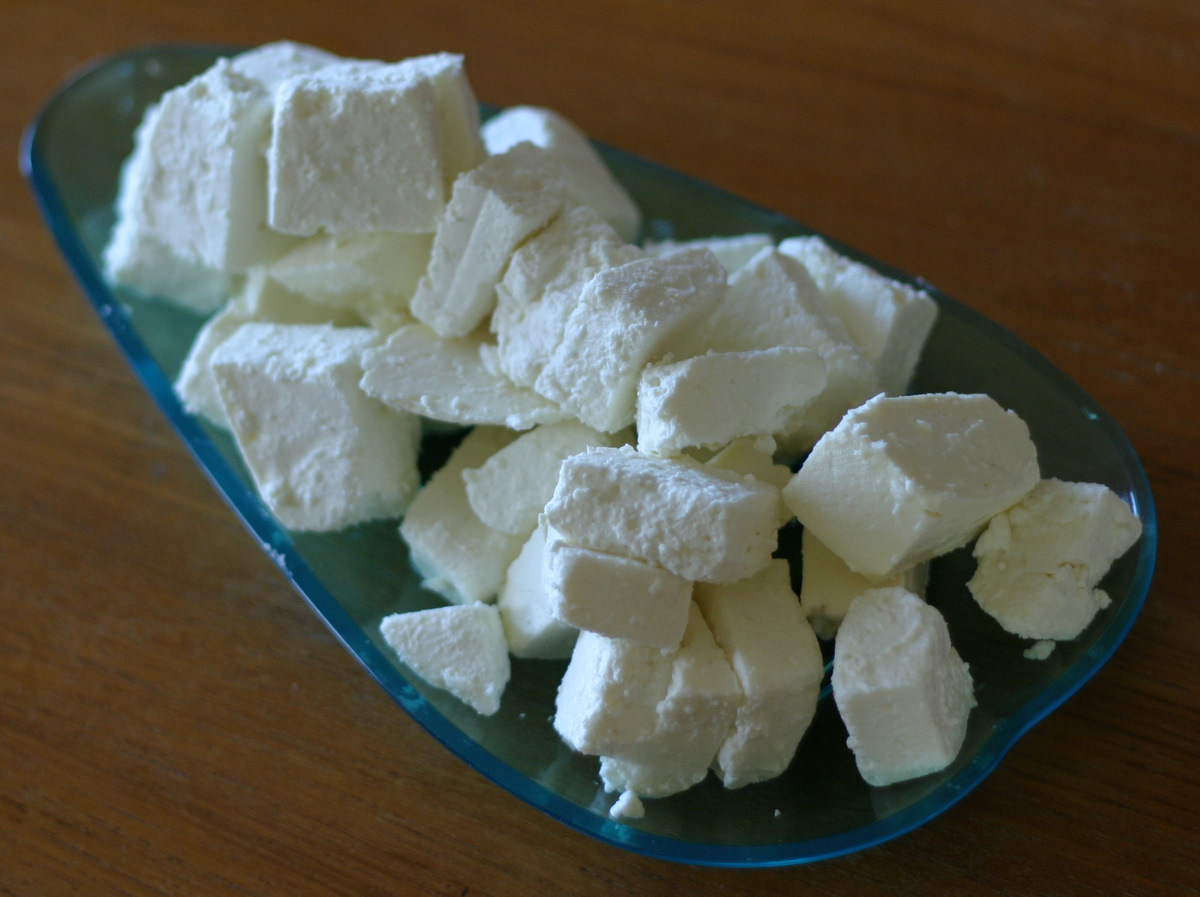 For my first live demonstration I chose to make Feta cheese since it was relatively easy and a perfect rennet coagulated cheese for the beginning cheesemaker to tackle. I wanted to discuss the results from using live starter culture instead of direct acidification, show what a clean break looks like, and walk through the process of cutting and cooking curds. I felt the demonstration went really well, and strangely no one complained about my long winded food science talk of enzymes and proteins. Blogger “Food and Books and Stuff” posted a lovely review on her blog.
I adapted a Feta recipe I received in the class “A Practical Introduction to Cheesemaking” which I took at Oregon State University. I added an introduction that covered home cheesemaking equipment and sanitation, edited it until it fit on the front and back of a single sheet of paper, and used the results as a handout. You can download it from the Joy of Home Cheesemaking site for your own first attempt at rennet coagulated cheese.
Due to the leftovers from the class and the trial makes I did in preparation, my family has a lot of Feta to consume. Weekends are my turn to make dinner, so I am making Spanakopita.
The owners of The Homebrew Exchange let me know a little while back that they were having an open house today, and the thought never occurred to me that it would be worth re-posting the invite. Talk about late notice, I apologize.
Anyway, if you see this post today, and happen to be in the neighborhood, drop in and say hi. I will be there with some sample feta cheese that I made for my demonstration next Wednesday. The owners of The Homebrew Exchange are super nice and they are showing a real commitment to carrying cheesemaking supplies. I was really excited to have another place in town to send people who need supplies.
The Homebrew Exchange is located at 1907 N Kilpatrick St, Portland, OR 97217, and the open house starts at 4 p.m. Here is a direct link to the announcement on their web site.
Portland has a great food community, including enough cheese enthusiasts to warrant a loosely formed organization of home cheesemakers called the DIY Cheesemakers. This group has been meeting at a great local cheese shop called Foster and Dobbs Authentic Foods.
I attended my first meeting last November and met Gayle Starbuck, who led a class on making fresh cheeses with direct set cultures. She and I talked after the class and I agreed to help set up an email list to help communicate between the meeting participants. That list now lives as a Google group, which can be found at diycheese.org.
I also talked to Luan Schooler after the same DIY meeting. Luan is one of the owners of Foster and Dobbs, and from what I can tell she started hosting the DIY meetings in 2008. I offered to do a cheesemaking demonstration. After an exchange of emails, I am now demonstrating making Feta on January 20th, 2010. I am very excited.
This weekend I have plans to visit a local goat farm to acquire some fresh raw milk and do a trial cheesemaking run at home. If the results are good, they will show up at the meeting on the 20th. I am also going to do a practice run with store bought cow milk to hopefully show the difference between the two milk sources. The demo will done with store bought milk, as that is what most people will be using in their own kitchens.
So if you are in the Portland area, come join the fun. See the details at diycheese.org.
I really like washed rind cheeses. So for our first podcast, Jeff Cowan and I followed a recipe for Muenster cheese which had us include b.linens along with the starter culture. A week later, I learned while taking the class at OSU (see previous post) that b.linens need oxygen to thrive and it is better to be applied to the outside of the cheese along with a 10% salt solution during the washing phase (I also learned that washed rind cheeses are one of the harder cheeses to get right). So when I returned from the class I drenched my Meunster cheeses with a 10% brine innoculated with b.linens. I left the surface dripping wet, which I fear may have been one of my many mistakes.
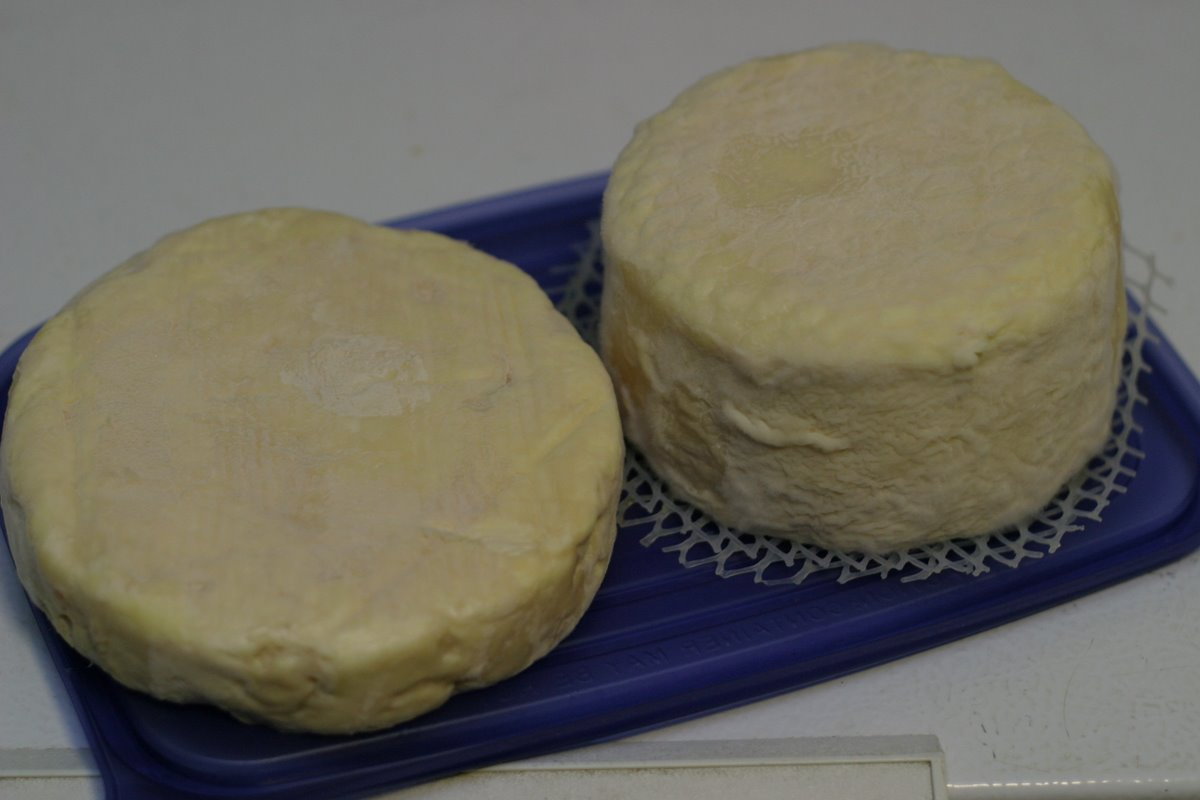
After 4 weeks I had a surface that was very slimy, with a strong Limburger smell.
There was no characteristic orange growth except for one spot on the smaller of the two cheeses.
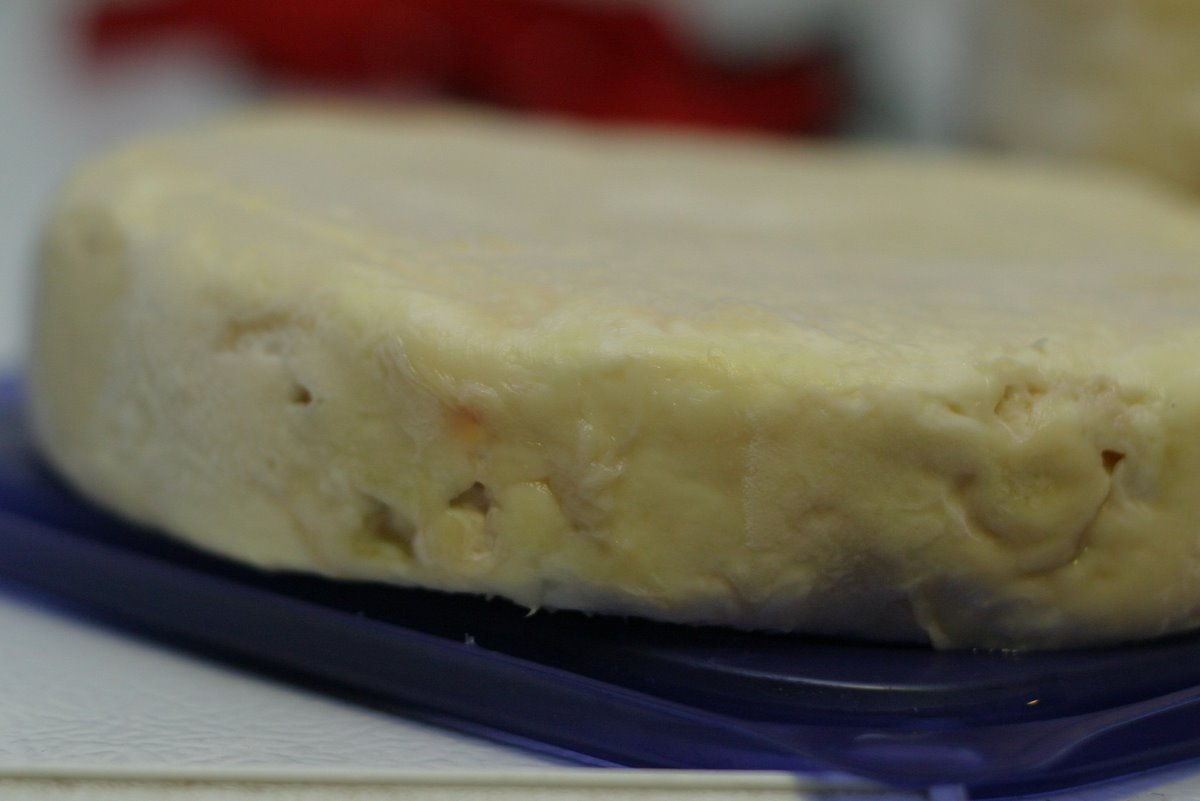
I posted in cheeseforum.org a request for advice and a little feedback, the best of which came from user francois who stated that I did not have b.linens growing, but instead a strong yeast infection. According to him, the smell I thought was coming from b.linen growth was coming from protein breakdown due to the yeast.
I tried scraping off the layer of slime and re-washing with a brine solution.
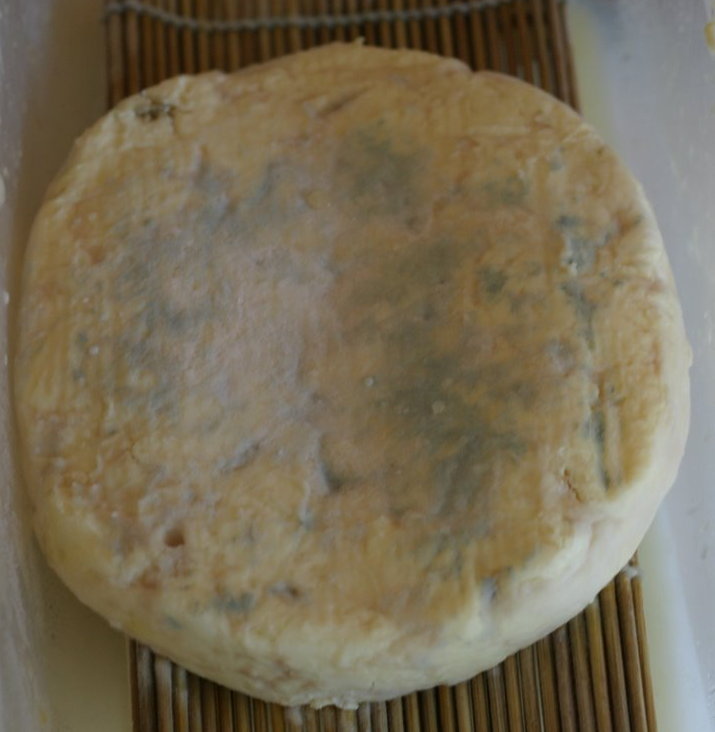
I will attempt this again in a couple of months, and try to avoid the pitfalls I encountered this time around.
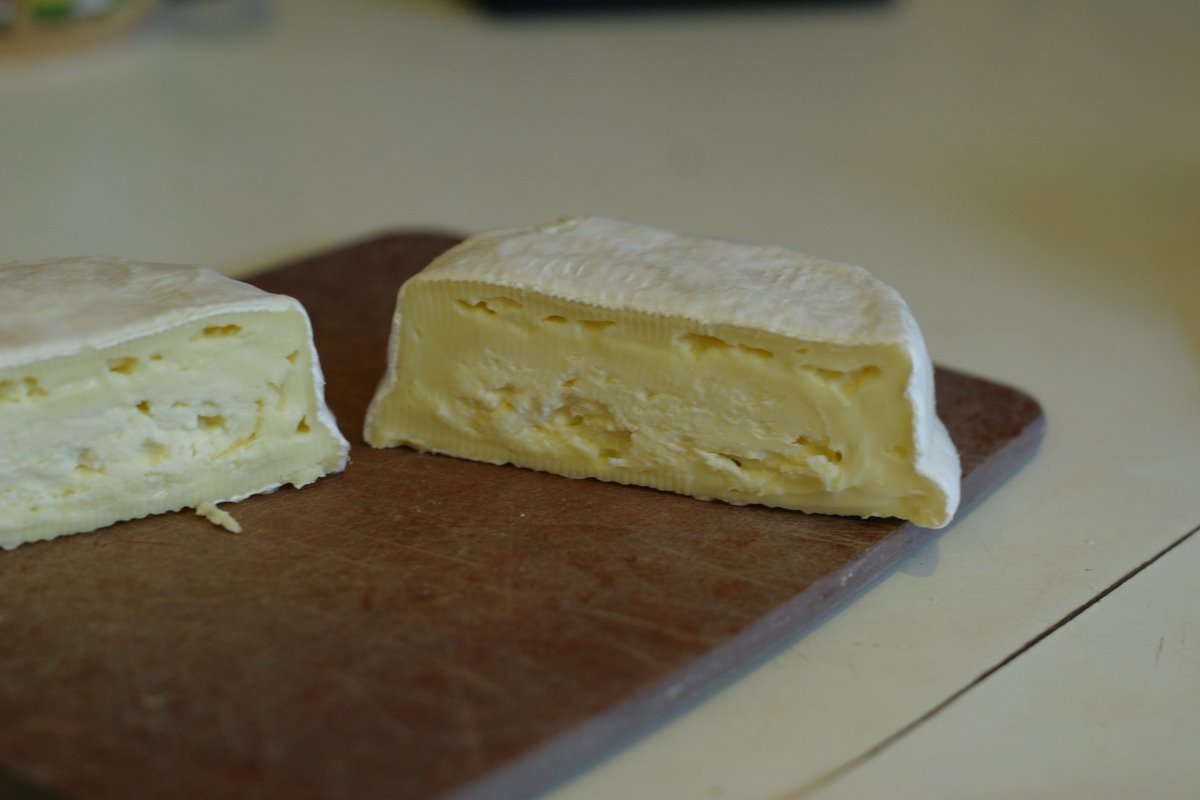
On the encouraging side, the Camemberts I brought home from the OSU class (rescued from going to waste) have turned out fantastic. They seem to need a bit more salt for my taste, but they are runny and have the right flavor. Now I need to give a lot of them away, as they probably only have a couple of weeks of perfect ripeness in them.
Anyone need some cheese?